In this post I will show how to install the Android OS on VirtualBox.
I’m normally using this during my Android Development to cut up my development time. I find deployment to the VirtualBox machine to be faster than deploying to the Emulated Android Devices, which come with Android SDK.
I’m using the emulated android devices normaly in the second phase of my development, to test the application on different devices more realisticly. And of course I also test on the physical device, but I’m normally limited here.
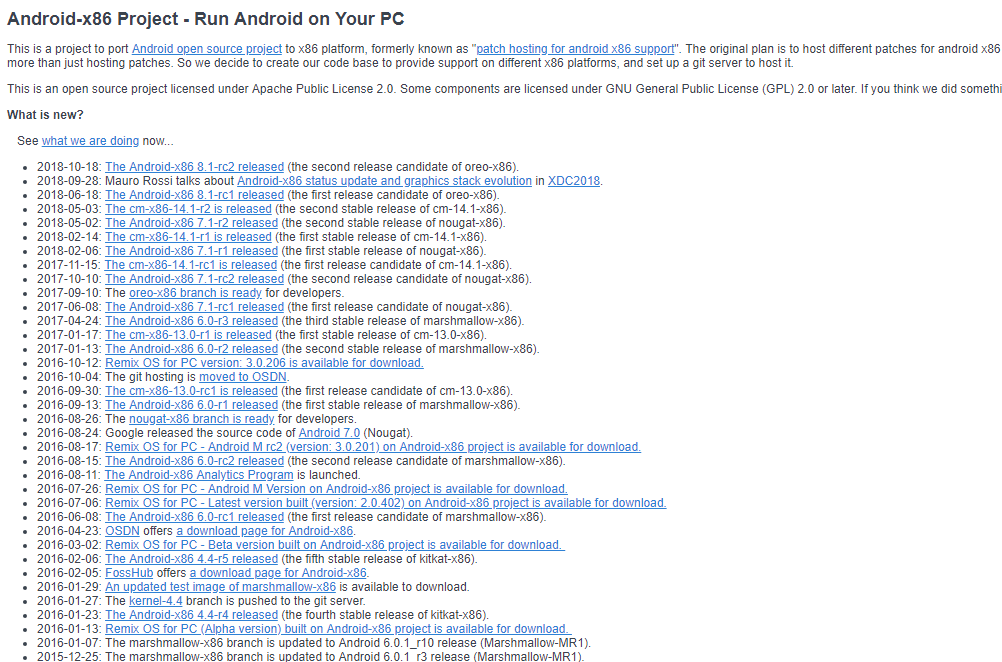
Android x86 is an open source project for porting the Android OS to the x86 machines. Under
you can find the different android version targeting x86:
For this demo I will pick up Android 7.1 (32 bit) (android-x86-7.1-r2.iso).
So, let’s go (I assume you have already downloaded an android version from the link above):
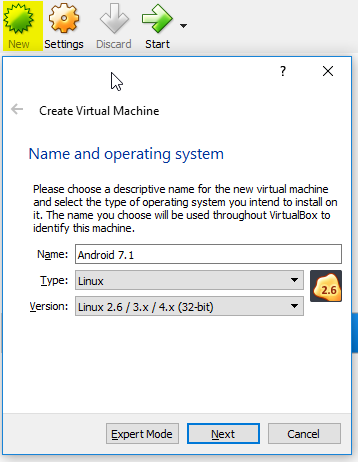
1. Start VirtualBox and create new virtual machine.
Set the machine type to Linux and Version to Linux 2.6 / 3.x / 4.x (32-bit).
Set the name for the new machine. I’ve chosen Android 7.1.
2. Set the memory size:

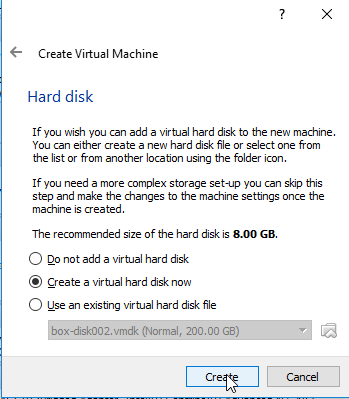
3. Select Create Virtual Disk now and create the new disk.
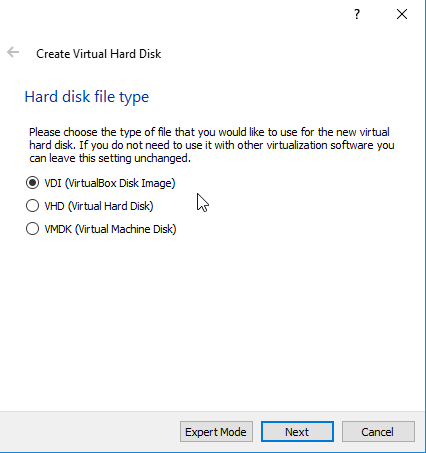
4. Set the hard disk file type to VDI (VirtualBox Disk Image)
4. Choose the Dynamically allocated storage for the hard disk, to let it expand as it needs.

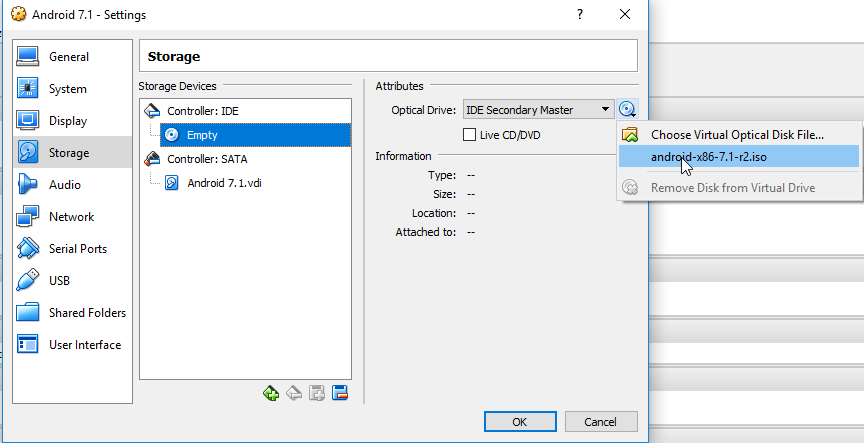
5. Setup an empty disk and insert the downloaded android iso installation image:
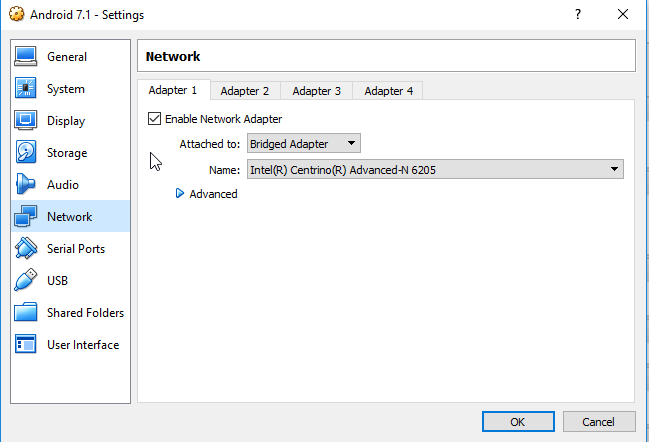
6. Select the network adapter. For development I’m using Bridged Adapter:
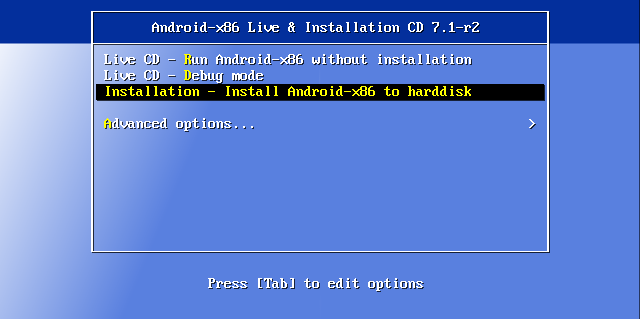
7. After starting the machine, if everything is set up correctly like described above, you should get into the installation prompt. You can preview the OS first by choosing Live CD.
For installation to the disk created above,
select Installation – Intall Android-x86 to harddisk:
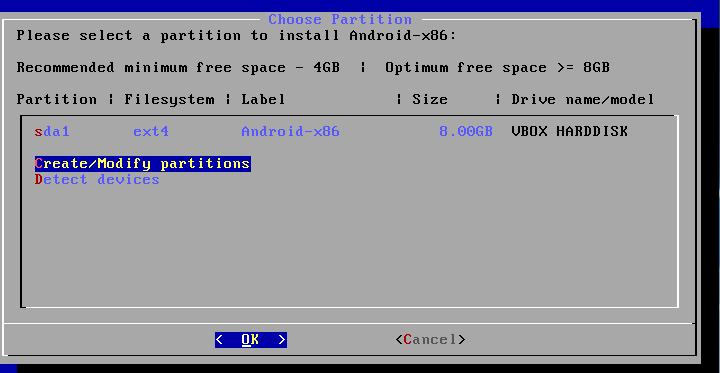
8. Create the partition on the new disk by selecting Create/Modify partitions
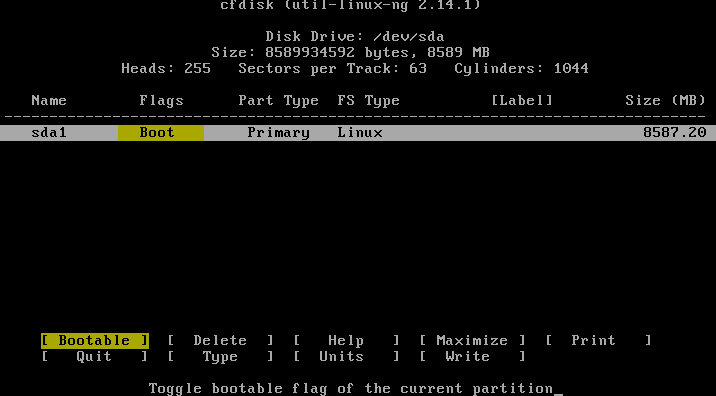
9. Create a new primary partition and set the bootable flag:
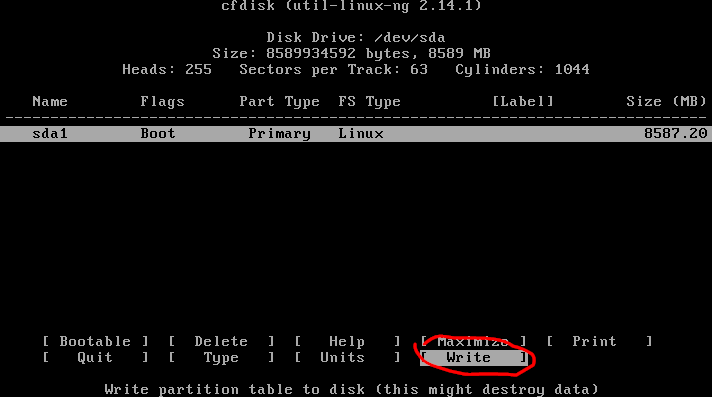
Don’t forget to write the partition to disk:
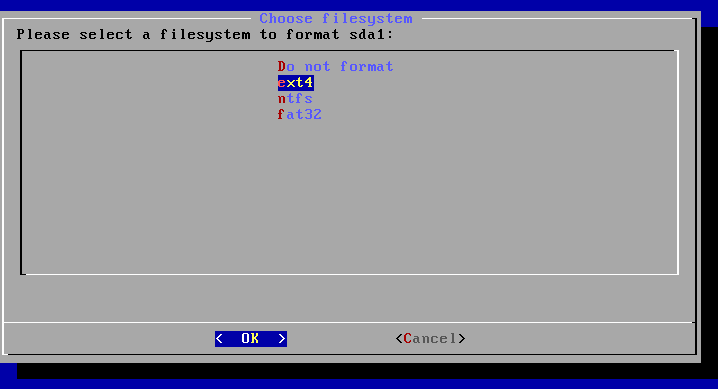
10. Choose the new selected partition for the installation and
format the filesystem as ext4:
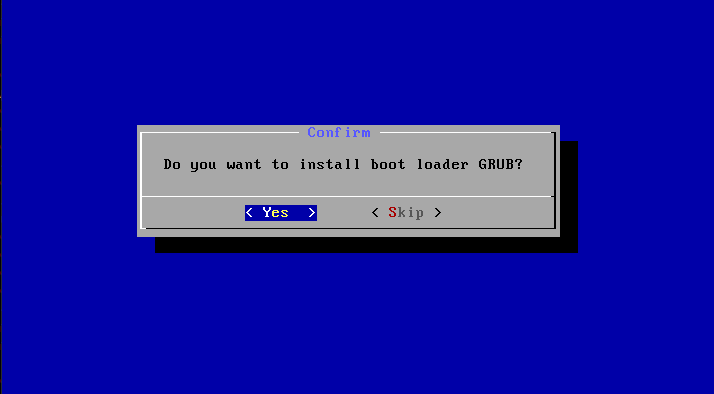
11. Choose Yes to install GRUB boot loader:
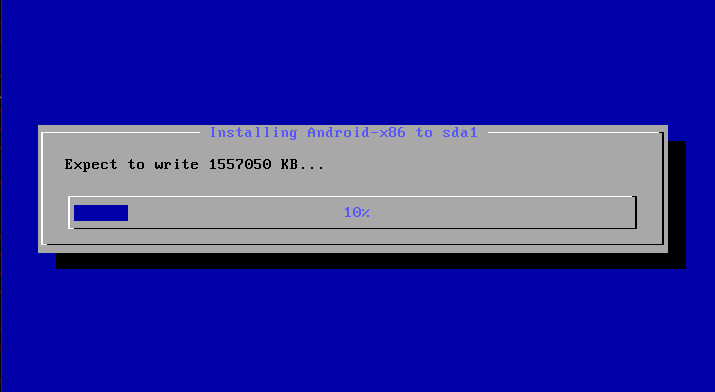
12. Choose Yes to install /system directory as read-write:

and wait until the installation process is finished:
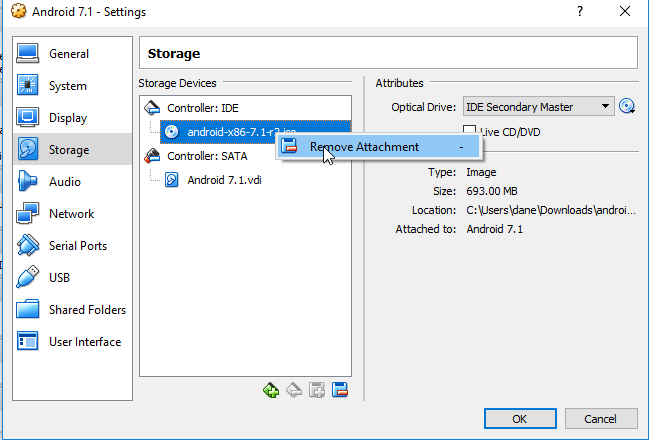
After the installation has completed, the newly installed android x86 is ready to run. Before running the installed android from the hard drive, turn off the machine and remove the attached iso-installation image (otherwise, according to the boot order, the installation procedure will be started again):
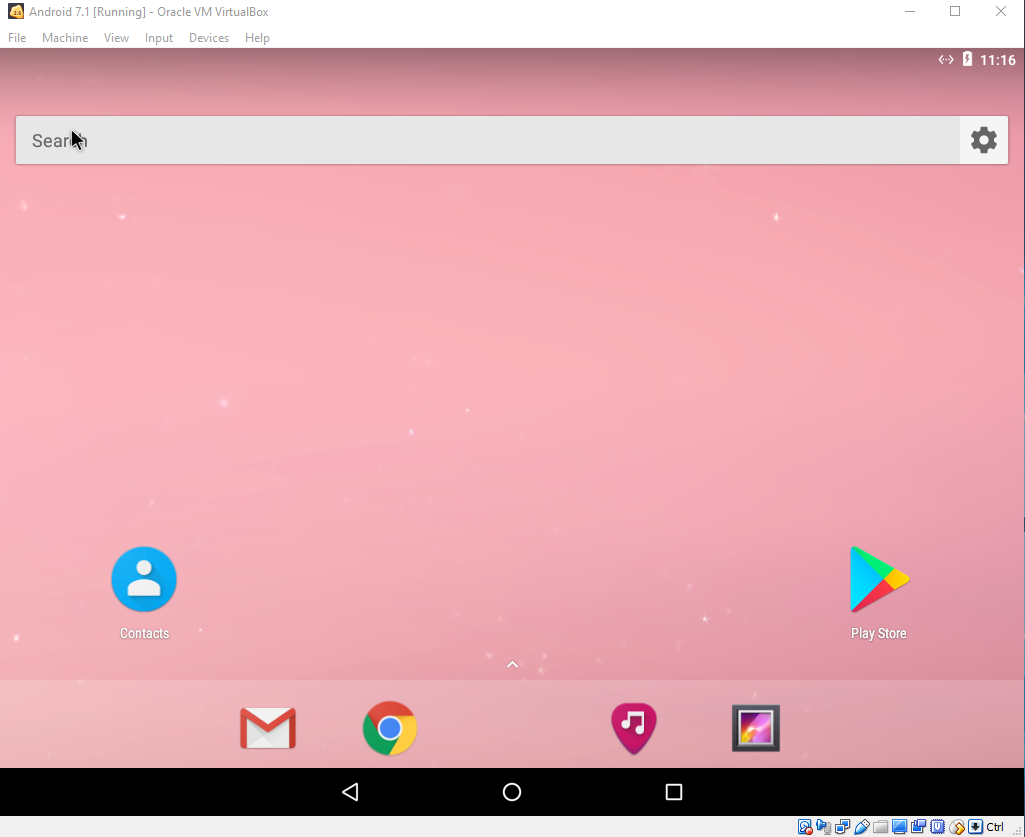
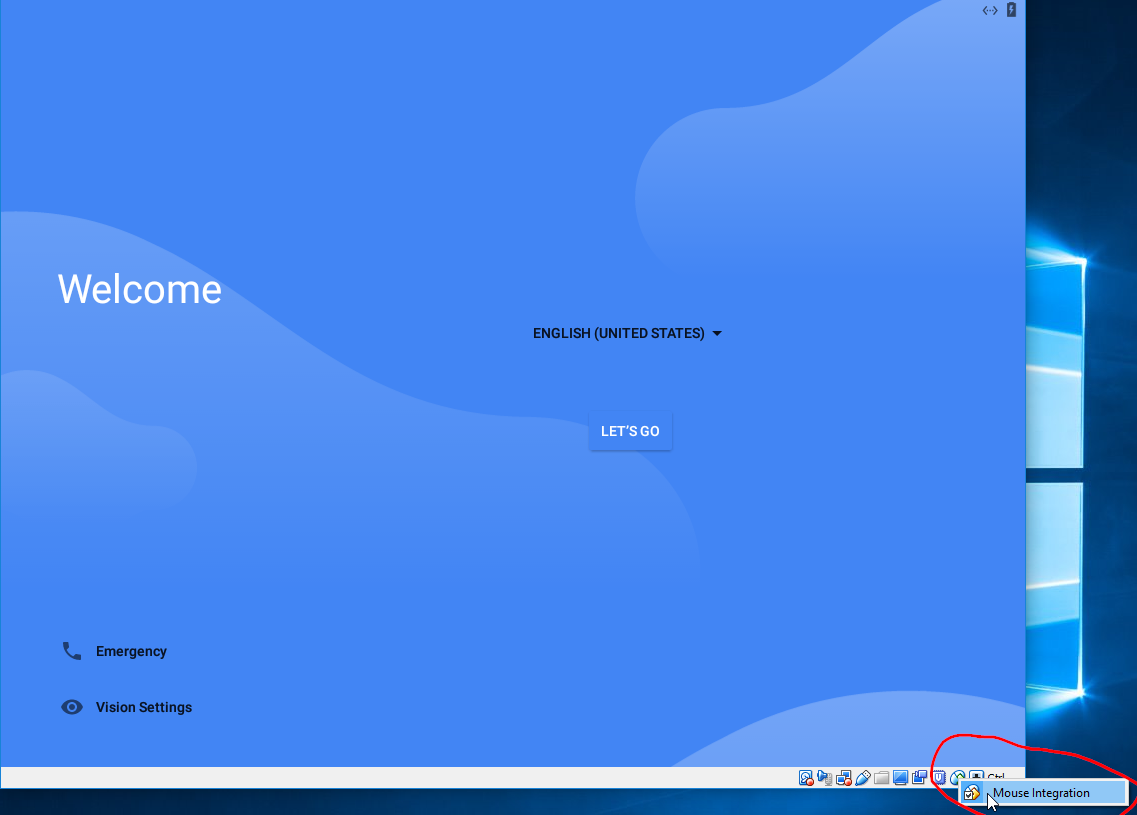
Now you can boot into your installed android:
For getting around with the mouse cursor problem in the guest, I would recommend disabling the mouse integration as below:
After finishing the configuration setup, you are ready to go with your new Android: