About CMake
This is the first part of the cmake tutorial. It is aimed to the absolute beginners and tries to explain the cmake principle in simple terms.
I assume that you already now how to write programs. I also assume that you know at least one compile programming language (and yeah … I mean C or C++ ).
So what is cmake really for?
Well, if you learned C or C++ (and I hope you did) than you have pretty sure started with the famous “Hello World” example:
#include <iostream>
using namespace std;

int main()
{
    cout << "Hello World!" << endl;
    return 0;
}
Visual Studio Project without CMake
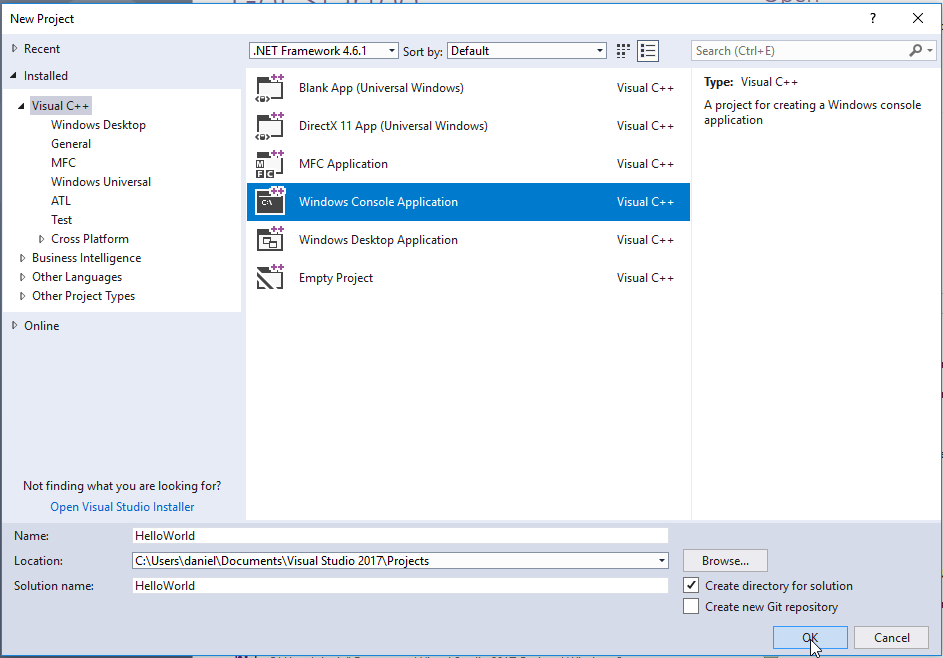
If you are on windows, then you have probably used Visual Studio to create a project and compile it, like:
- Create new Visual Studio C++ console application project:
- After inserting the source code ( I’ve disabled automatic generated precompiled headers – stdafx.h), the VS solution looks like
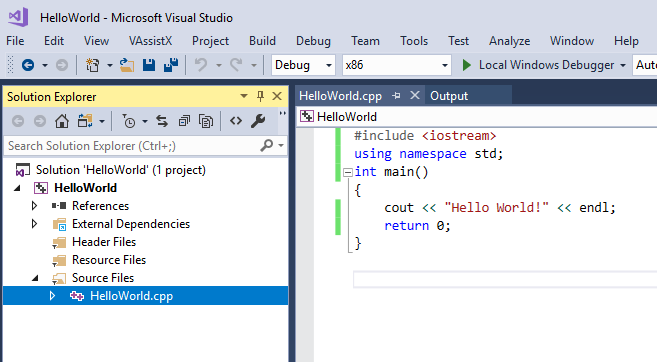
and the folder structure:

Now you can compile this, insert some more code, etc.
Makefile project without CMake
Lets check how we would set up a simple HelloWorld project on a Unix-like system (of course one could simply compile the file direct, like
g++ -o HelloWorld HelloWorld.cpp
but for the larger project with multiple files, one would need some kind of project organisation, like Makefile project):
-
- Create a simple Makefile with following content
# Makefile
CXX = g++

HelloWorld: HelloWorld.cpp
    $(CXX) -o HelloWorld HelloWorld.cpp

.PHONY: clean
.clean:
    rm -f HelloWorld
- To compile the project run make HelloWorld in the shell
Like you see, there are different kinds of platforms and build systems, each one having it’s own project structure and organisation.
Wouldn’t it be nice to be able to describe the project just once and be able to build it on all kinds of platforms and build systems ?
Well, that is the CMake is for!
Using CMake
Our simple HelloWorld project in CMake terms would look like:
# CMakeLists.txt

cmake_minimum_required(VERSION 2.8)
project(HelloWorld)
add_executable(HelloWorld HelloWorld.cpp)
That’s it!
We say here, that we are having one project named HelloWorld and that it consists of one executable named HelloWorld which consists of one source file HelloWorld.cpp. That’s the basic information the cmake needs.
Now we can let cmake generate the project files for the build system we want.
The cmake executable should be on the Path (%PATH% on Windows, or $PATH on Unix/Linux). So if we go within the folder where the CMakeLists.txt resides and run
cmake .
this would generate the project files for the native build system on the platform we are. On Windows this is by default the Visual Studio project. On Unix/Linux this would be the Makefile project.
Let’s try this on Windows first.
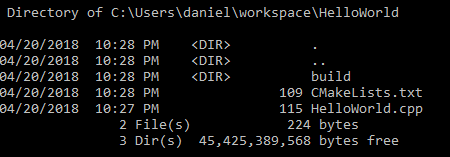
Create the folder HelloWorld/ somewhere on the the drive and put the files HelloWorld.cpp and CMakeLists.txt within HelloWorld/ folder.
Within HelloWorld/ folder create also an empty build/ directory. We are going to put our generated project files within this directory to keep our source directory clean – by the way, this is the common practice and should be preferred. Now your folder and file structure should look like this:
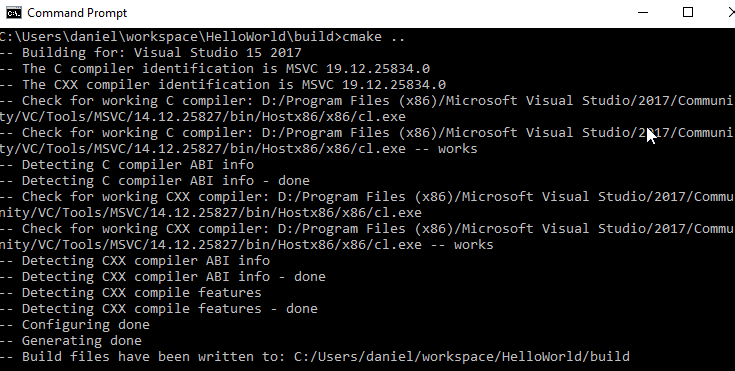
Now switch to the build directory and run
cmake ..
The output on my system looks like following:
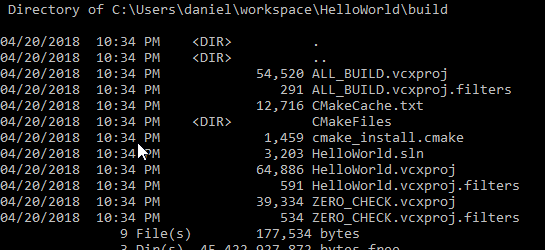
Now if you check the files within build/ directory, you can see that the cmake has generated the Visual Studio solution files:
If you double-click on HelloWorld.sln or HelloWorld.vcxproj file then you can open the generated solution within Visual Studio and work further on the project:
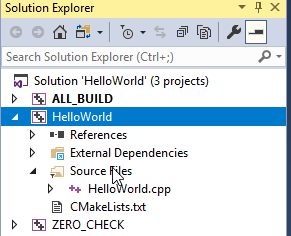
Notice that you generated the complete VS Solution with just the 3 lines from CMakeLists.txt file! All the job of generating the appropriate solution files did the cmake executable by just reading those 3 lines! – isn’t that wonderful ?
On Unix/Linux the procedure is the same. After running cmake .. from the HelloWorld/build/ directory the cmake generates the Makefile files. Now you can build the project by simply running
make
within the build/ directory.
So, with a single CMakeLists.txt description of our project we can feed the cmake and let it generate the project for the build system we want.
We have demonstrated this for a Windows and Unix/Linux- like systems, but it works for the other systems the same way.
In the other tutorial I am going to talk about some more basic options.
And there will be one more tutorial about some advanced CMake features.